Sunday, March 29, 2009

Whole Wheat Sourdough Pizza by Mike

For my first contribution to Charleston Pig I figured I'd chronicle my attempt at making super thin whole wheat sourdough pizza. Not only is there no pig, but there's no meat or grill involved whatsoever. So....here's a picture of a porterhouse and a bison sirloin marinating next to a beer and a bottle of olive oil just to sort of tie it all together...or not.


The Sauce
I started Saturday afternoon making the sauce since I like to give it a day for the flavors to do whatever they do. I opened a 28 oz can of San Marzano whole tomatoes and went through a ridiculously tedious process to strain out the seeds and remove the bitter excess liquid. After that I just used an immersion blender to crush the whole tomatoes until there are no large solid pieces left but still had some texture too it. To this I just added a pinch of dried oregano, a pinch of sea salt, a pinch of sugar, and a pinch of red pepper flakes. I mean just a pinch because I like to taste the tomatoes. That's it, no cooking, just let it sit in the refrigerator over night.

The Dough

  • 3 1/2 cups whole wheat bread flour
  • 5 1/4 t wheat gluten
  • 1 T olive oil
  • 3/4 t dry yeast
  • 1/3 cup sourdough starter
  • 1 1/2 t honey
  • 1 t sea salt
  • 3/4 cup room temp water

After finishing the sauce I started on the dough. I took a dough recipe from some pizza dork website and wanted to alter it a little to use my sourdough starter and then substituted honey for the original sugar. First I sifted the flour and gluten in order to lighten up the whole wheat flour, supposedly this will keep it from being too dense. Next I mixed the water, oil, dry yeast, salt and honey in the mixer until it was thoroughly mixed. I then put the dough hook on and added the sourdough starter and started mixing on low while gradually adding the flour. The original recipe said to only mix until it forms a ball....this took about 3-4 minutes. I let it sit for a few minutes in a lightly oiled bowl and then covered in plastic wrap and put it in the refrigerator overnight. It is suggested you let it rise in there for 24 hours. Here's an exciting picture of a dough ball.


The Pizza
Sunday evening I pulled the dough out and let it come to room temp while the oven heated up to 500 degrees. I tossed some flour on the counter and started to roll out the dough trying to get it as thin as I possibly could. I could have gone thinner but it was evident that I wouldn't be able to easily get the dough on the pizza peel so I stopped before I screwed up 24 hours of preparation. after getting it on the peel and pinching the rim up in an attempt to create a lip I used a chop stick to put a bunch of little holes in the dough. This keeps big bubbles from forming. Typically there is a tool called a docker to do this but I found the chopsticks to work just fine.


Finally I put the sauce, fresh mozzarella, Parmesan cheese, kalamata olives, roasted red peppers, and artichoke hearts on the dough and tossed it in the 500 degree oven on a pizza stone. after 7 minutes I took it out an threw on some fresh basil leaves and put it back in for 5 minutes. I was satisfied with the results. I think I would double the honey to a tablespoon and maybe cook it on a pan so I could brush it with olive oil to give the crust more flavor. It was a bit on the bland side but had good texture.


The End
I promise the next installment will have pigs on smokers.

Thursday, March 12, 2009

Marion done made some sour bread

 
It was an adventure, and I am sure that the other bread dork on this blog will post some of his experience too, but basically we used a starter from wild-yeast and greek yogurt, and once it was groovy, used the recipe on williams and sonomas website, except we did use wheat flour with wheat germ.


Thursday, December 11, 2008

BBQ Nachos by Ben

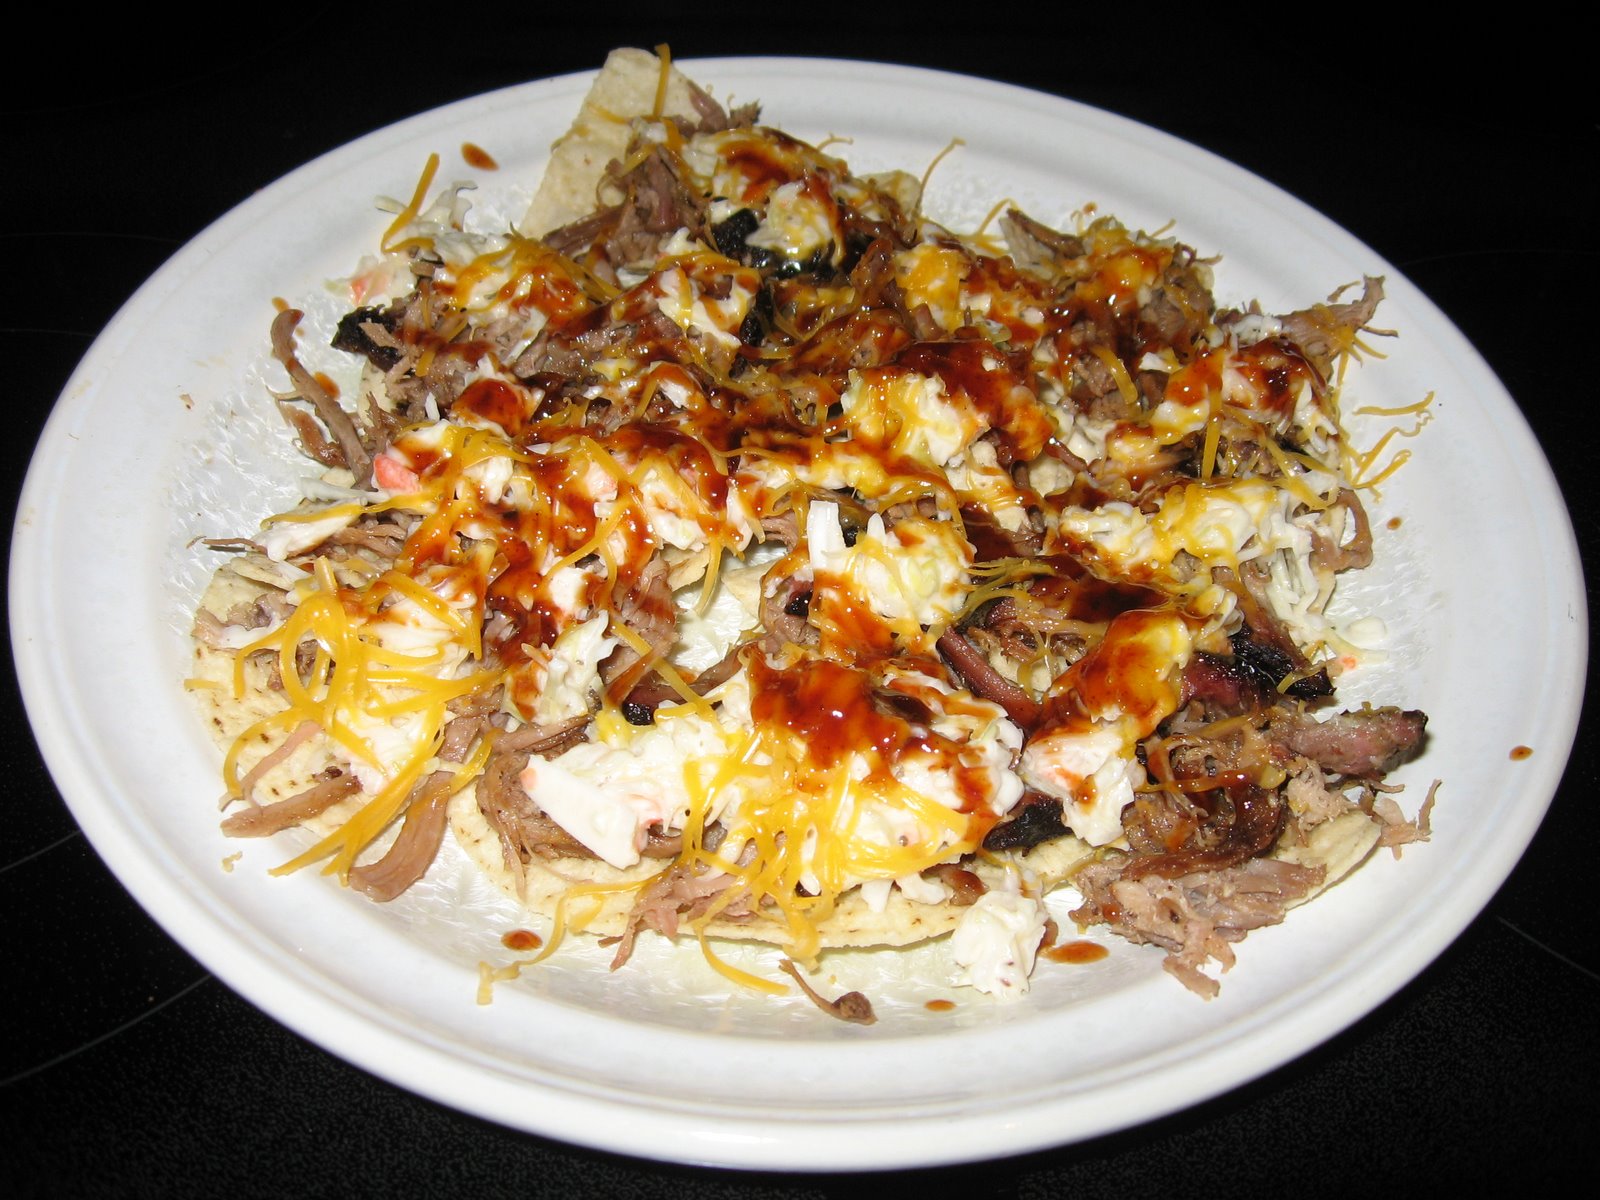
Okay, so we have this theory that we could have a whole restaurant based only on this pork, and since wraps, tacos, and sliders have already been well proven, I wanted to delve into nachos. I mean hell, anything on a chip is good right? So took some heated pulled-pork and individually dressed some chips, then added cole-slaw, a little grated yellow cheddar cheese, microwaved 30 seconds, and drizzeled some of the honey bbq sauce on it. Wasn't bad, but I think could be much better. I think either the cheese or coleslaw could be improved on, as well as figuring out which parts should be cold and which hot. Just had to put it out there.

Hot coals, hot butt by Ben

Well, hadn't had the smoker going in a while, but my mom was briefly in town last weekend, and since she was the one who bought it for me as a birthday present, I thought it was long overdue. I started Saturday night which was a bit cool, though not freezing but not hot. A few things were different from the get go. 1) I added more coals initially, though still used the hole in middle approach, and 2) had really large hickory chunks, and a couple of those were on top which had some serious smoke initially (but died down about when meat went on). I used the same methods as previous with 2 ~8 lb butts from the nice folks at the Pig on Folly (already forgot their names, but they always hook me up, and do some good fat cap trimming). I didn't get home till 8, and injected and rubbed, and covered with saranwrap, but left out since they needed to warm up before the grill.


Here is the temp log (and note that the temps were higher, and stayed consistent through-out, very different than previously):
Time   Temp   Vents          Comments
8:00                                  got home and started
9:30                                  started coals (added a few more than 20 well burned, hot coals)
10-ish   280    50 all          Pork on
10:15    270    50,25,25
10:30    270    25---
11:00    250    no change
12:30    250    25--
7:00      245    25--            water out, so refill with hot; baste; add coals & wood chunk
7:30      180    50--
8:00      230    50,25,25     baste
9:00      230    no change    baste
10:00    230    0,25,25       baste
11:00    220    no change    add coals then baste
12:00    210    0,0,25         baste; meat @190;
12:30                                 wrap

eat at 5


So, this was much warmer than normal which is why I only did 14 h, and probably they were done at 12 h. The smaller of the two butts was burned/overly crispy on bottom, but overall, they were seriously moist and possibly the best that I have done.


Since I had only thought of cooking the meat, I invited Chris, Tracey, Billie, Nik and of course Mike over last minute with instructions for sides. So, with some wonderful squash casserole, potato salad, cole slaw, and the previously mentioned vinegar and honey sauces (as well a store bought mustard), we had a pretty good time.


And just for fun, here was Gus and Mom chillin' on the couch really getting into a movie.


Friday, August 29, 2008

Cooking in the heat by Ben

This post is about 3 weeks late, so you will have to imagine the weather.  Shaine, Marion's sister came down with 5 of her friends and we did BBQ for them.  So, friday at lunch I went to the trusted Folly Pig, and found the butcher and he had one more package of butts.  The really cool thing this time is that I had him trim them both, and he actually used this weight to charge me.  So I had two ~7 lb trimmed (no fat cap) butts. I proceeded as normal with injection and rub (see here for original): 

Inject & Rub The Pork Butts Prepare a batch of pork injection...
Chris Lilly's Six-Time World Championship Pork Shoulder Injection

3/4 cup apple juice
1/2 cup water
1/2 cup white sugar
1/4 cup table salt
2 Tablespoons Worcestershire Sauce
Combine all ingredients and stir until sugar and salt are dissolved.
...and a batch of pork shoulder rub (Picture 1).
Chris Lilly's Six-Time World Championship Pork Shoulder Rub

1/4 cup dark brown sugar
1/2 cup white sugar
1/2 cup paprika
1/3 cup garlic salt
1/3 cup kosher salt
1 Tablespoon chili powder
1 teaspoon oregano
1 teaspoon cayenne pepper
1 teaspoon ground cumin
1 teaspoon black pepper
Combine all ingredients and mix thoroughly.
Place one of the butts in a baking dish and inject in 12-16 spots with 1/4 of the injection solution. Pick a spot, stick the needle deep into the meat, and slowly depress the plunger while pulling the needle out, then repeat in a different spot. You should be able to inject several spots before needing to refill the injector. The solution that collects in the bottom of the baking dish can be re-injected if you start to run short.
The meat is not a sponge and will not hold all of the injection solution. It is normal for much of it to run out.
Turn the butt over and inject with another 1/4 of the solution, then set the butt aside. Repeat the process with the second pork butt.

Mike came over to 'help' (aka drink and watch fire).  The biggest difference this time was the wind and heat. Normally I feel like my grill runs a bit cool (closer to 220) but this time it was running more 240-250.  Here is the temp log:

Time     Temp       Comments
1000pm start coals with about 5 large wood chunks in mix
1030    250 put meat on and cut vents to 1/4
1130    250 cut vents to 0, 0 and 15%; wait to stabilize
1230    230 put all vents at between 25 and 50%
130      steady temp, go to bed
730      220 baste (apple juice and some rub with some worcestershire)
830      195 add coals, baste, vents at 100, 50, 50%
930      210 baste
1000    230
1100    230 baste, meat temp 160-170
1200    235 baste, meat temp at ~170, all vents to 50%
100      230 baste, meat temp 180 for both
230      (i actually didn't write this down, but assume went 16h) remove meat and wrap and put             in cooler and go to beach
430-ish remove meat, pull and didn't deal with fat since was well cut and remaining fat was melted

Here is the meat right before it came off.

Also, I will post the two sauce recipes used, which were ridiculous.  And about those sauces, Marion lended her gravy expertise to them, which meant the got all 'silky' and they were really good.  And honestly, the meat was the best I have cooked (and hopefully not the last time it will be that good).  Next time will add mustard coat before rub, and maybe something else...


Honey BBQ Sauce
½ cup cider vinegar
½ 7 oz. can Chipotle Peppers in Adobo Sauce
6 tablespoons packed light brown sugar
¼ cup molasses
¼ cup honey
¼ cup Worcestershire sauce
2 tablespoons yellow mustard
1 tablespoon Ancho chili pepper
2 teaspoons ground black pepper
2 teaspoons garlic powder
1 teaspoon ground allspice
¼ teaspoon ground cloves
4 cups ketchup

1. Add vinegar and Chipotle peppers in Adobo to a blender and blend on high until peppers are liquefied.
2. Combine everything in a medium sauce pot, bring to a bowl, reduce heat and simmer for 30 minutes. Use care to avoid burning sauce when bringing to a boil.
3. Season with salt and pepper as needed.
4. mix 1 part honey to 4 parts sauce if desired for serving

Sunday, May 25, 2008

You can leave the fat on by Ben

I was in a strange situation of making BBQ for next weekend since I didn't have time to do it closer the actual serving time. I have made BBQ a few times previously using the injection method listed here and decided to do this again. But after a conversation with good men at the Pig on Folly, decided to leave the fat cap on. Now, they went and got two gorgeous butts from the back, 7 lbs each and trimmed the fat cap slightly. Here is what that looked like:


Since I was doing this for later, I was able to schedule things so that I got the maximum amount of sleep (no 2 AM start and checking again at 6 AM). I rubbed the meat down the night before, wrapped in saran wrap and put in the fridge.


Woke up at 7 and got the grill going using a modified coffee can method (I used a small flower pot to keep a hole in the middle of the coals) with only a few wood chunks, though I added more later. Here is the meat post-injection, warming up waiting to hop on the grill:


After that, I put them on the top shelf and followed a somewhat random scheme to grill for 16 hours, as seen here:

Started moving at 7 and got grill going
inject rub and let sit
add hot water when add starter coals
8:20 AM temp @ 250, add meat top shelf cap up; adjust vents to 25%
9:00 AM temp @ 240
10:00 AM temp @ 255, close 2 vents to 15%-ish
1:00 PM temp @ 230, add hot water and baste
2:00 PM, baste and add coals and wood chunks
3:00 PM, open 2 vents 100%
4:00 PM temp @ 240, vents all open
5:00 PM temp @ 245, baste and add water
nap
8:45 PM temp @ 230, add water, baste, meat temp of both @ 190 so decrease vents to 25% to last coals few more hours
10:00 PM temp @ 200-ish with vents practically closed, baste
11 and 12 PM temp @ 170
12:00 PM (or is it AM) wrap put in cooler


At 12 that night, I wrapped them in foil and put them in a cooler. When I got up at 7, I removed the fat, and pulled the meat.


Initial thoughts: the meat is definitely good, and probably the best quality I have cooked with yet. Using the fat cap and no trimming definitely made the meat juicy, but with the injection method I have used (and did use this time), moistness isn't really an issue. The cons of this method are that the wonderful crusty outside is lost where the cap was since this is removed for pulling. Also, the meat seems to be a bit more greasy. All in all, I think if I didn't do the injection, and didn't have the time to watch the meat and baste accordingly, this would be a fine method, but as things have been turning out, I am not sure if I will do it again.